Nmap, also known as Network Mapper, is a fantastic free and open-source application that acts like a network scanner. Its main job is to discover all the hosts and services available on a single network.
The way Nmap does this is by sending out multiple packets on the network and then carefully analyzing the responses it receives. Essentially, Nmap works as a scanner, helping us find all the hosts that are hanging out on a network.
If you’re in the world of Infosecurity, you’d truly appreciate the value of a tool like Nmap, especially if it came with built-in anonymity. Imagine having the power to use it as a testing tool, employed by ethical hackers and penetration testers, to uncover vulnerabilities in networks without leaving any traces.
While there are various methods to add anonymity when using Nmap, such as utilizing an idle scan, proxies, or even Tor, we’ll focus on a Linux-exclusive approach in this guide – using ProxyChains.
Don’t worry if you’re a bit unsure about how to use Nmap with ProxyChains; this guide is tailored just for you. So sit back, relax, and let us take you through the process of using Nmap with ProxyChains.
Without any more delays, let’s dive right in!
Table of Contents
Understanding ProxyChains
Before we dive into the details, let’s get a grasp on what proxies and ProxyChains are all about.
Proxies play a clever role by routing your data traffic through multiple machines, effectively concealing your original device in a sea of other machines. This nifty technique not only helps keep your machine hidden but can also bypass network restrictions when needed.
Now, specifically for Linux users, we have ProxyChains, a powerful tool that handles all these proxy-related tasks effortlessly. It’s like a traffic director, forcing TCP connections to travel through various proxies, such as Tor, sock4s, socks5, and HTTP proxies. The best part is that you can even chain multiple proxies together, adding an extra layer of anonymity to your online activities.
Understandably, ProxyChains has garnered a lot of attention from the infosec community and hackers alike. Apart from the basic features, this tool comes with three distinct operating modes:
Dynamic chain configuration: In this mode, at least one proxy should always be available. It’s smart enough to skip any unavailable proxies in the chain.
Strict chain configuration: Here, all the proxies in the chain need to be available and arranged in the correct order; otherwise, it won’t function.
Random chain configuration: In this mode, ProxyChains will use a random combination of proxies for each connection. You even have the option to specify the total number of proxies to be used.
Now that we have a good grasp of ProxyChains, let’s dive into how to use it in conjunction with Nmap.
Read: Download Nmap for Android (Complete Guide)
Step 1: Installing ProxyChains – A Walkthrough.
Getting ProxyChains up and running is a piece of cake, and all it takes is a few command-line inputs. If you’re using a Linux distribution based on Debian, follow these simple steps to breeze through the installation process.
- First things first, let’s fire up the terminal by pressing Ctrl + Alt + T.
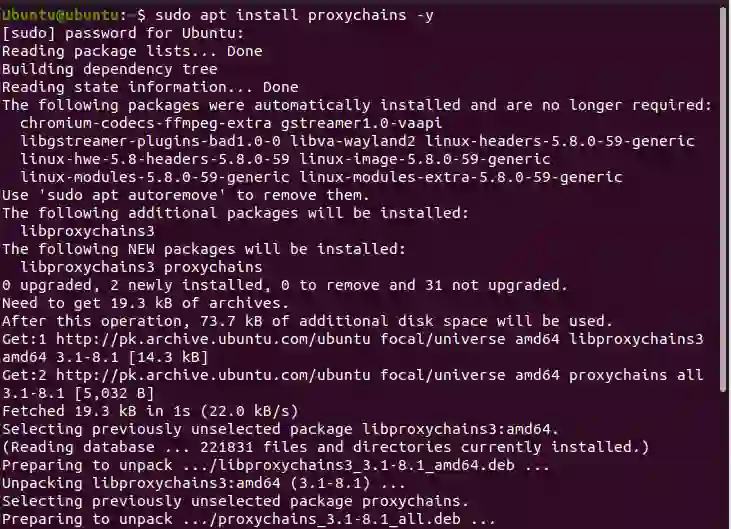
- Now, type in the following command and hit Enter:
| sudo apt install proxychains -y |
For those of you on RedHat/CentOS systems, the command is slightly different:
| sudo yum install proxychains |
And for ArchLinux users, it’s as easy as this:
| sudo pacman -S proxychains-ng |
Once you execute the appropriate command for your system, ProxyChains will be installed and ready to go. Now, let’s move on to the next step: configuring ProxyChains.
Step 2: Configuring ProxyChains – Let’s Get it Set Up!
Alright, now it’s time to configure ProxyChains and get things up and running. By default, ProxyChains uses Tor as its go-to protocol, but don’t worry, I’ll guide you through the process of enabling it and making the necessary configurations.
Let’s start with enabling the Tor protocol. Follow these steps:
- Open up that trusty terminal by pressing Ctrl + Alt + T.
- Type in the following command and hit Enter:
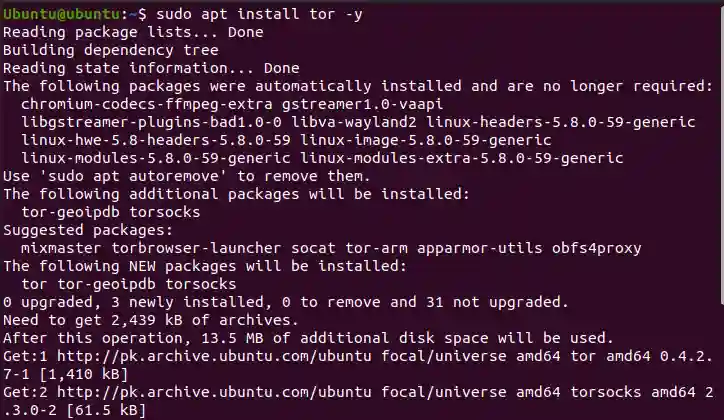
| $ sudo apt install tor -y |
This will get the Tor service up and running on your system.
- Now, to start the Tor service, type the following command:
| $ sudo service tor start |
Voilà! The Tor service is now up and running.
Now that we’ve got Tor enabled, let’s move on to configuring the ProxyChains configuration file. For those of you using Debian-based Linux distributions, just follow these simple steps:
- Open the terminal using Ctrl + Alt + T.
- Type the following command to access the configuration file:
| $ sudo nano /etc/proxychains.conf |
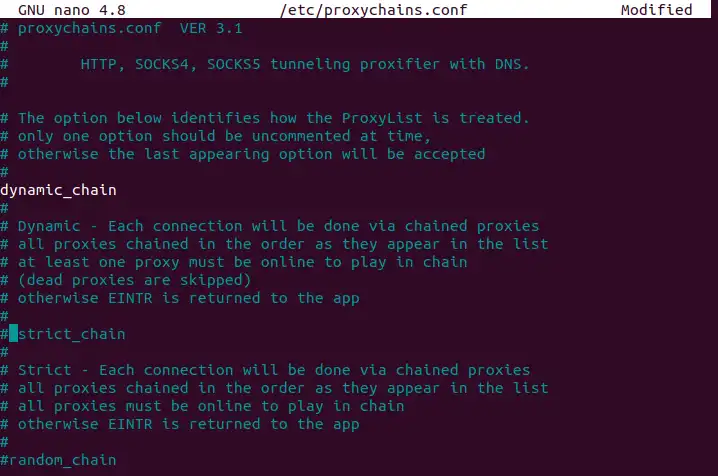
- In the configuration file, we need to make a couple of changes. First, uncomment the line that says “dynamic_chain” by removing the “#” symbol. And at the same time, comment out the “strict_chain” line by adding a “#” at the beginning.
With this setup, your proxy will be using the Dynamic chain mode.
If you scroll down a bit further, you’ll come across a feature called “proxy_dns.” Adjusting this feature will prevent DNS requests from going through your ISP, adding an extra layer of anonymity through name resolution.
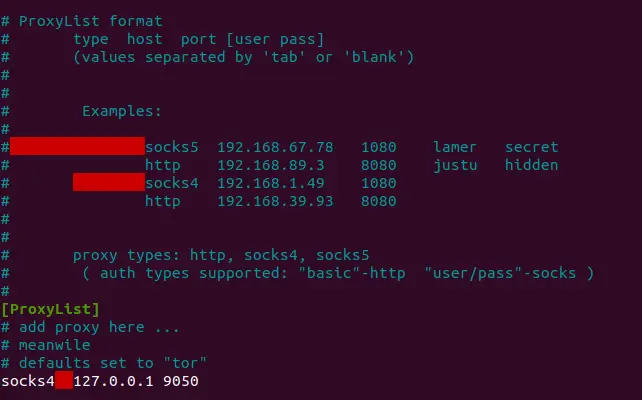
To add a proxy, use the following syntax:
| <protocols> <hosts/IP> <port> <user> <password> |
If your proxy doesn’t require a designated user or password, simply leave those fields blank.
If you’d rather use the strict chain configuration, just uncomment “strict_chain” and comment “dynamic_chain.”
Once you’re done with the configurations, you can restart the Tor service by typing the following command:
| $ sudo service tor restart |
Now that everything is set up, you can put ProxyChains to the test! Give it a whirl with Mozilla Firefox by typing the following command:
| proxychains firefox |
Step 3: Running Nmap with ProxyChains – Let’s Get Scanning!
Now that we’ve got ProxyChains all set up and ready, it’s time to dive into the main event – using Nmap with ProxyChains. Don’t worry; it’s not as daunting as it sounds. Just follow these steps, and you’ll be using Nmap in conjunction with ProxyChains like a pro!
But first, a quick heads up – there are a few restrictions you need to be aware of when using ProxyChains with Nmap. For instance, DNS resolution won’t work with Nmap, so you’ll need to use the Target IP address instead. Additionally, you’ll be limited to TCP techniques using the -sT flag, as ICMP/UDP scans won’t be supported.
Okay, let’s get down to business. Follow these steps to install and use Nmap with ProxyChains:
- Fire up your terminal by pressing Ctrl + Alt + T.
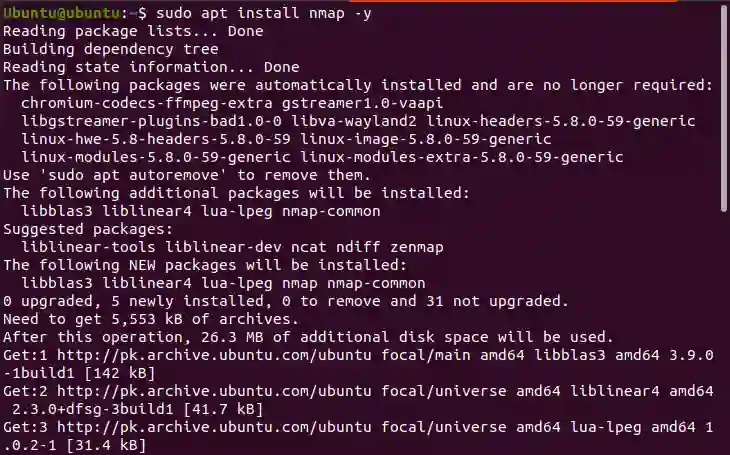
- If you’re using a Debian-based Linux distribution, install Nmap with this command:
| $ sudo apt install nmap -y |
For Red Hat/CentOS users, it’s a tad different:
| $ sudo yum install nmap |
Great! Nmap is now installed and ready for action on your system.
- Now, let’s get scanning! Run an Nmap scan using this command:
| proxychains nmap -Pn -sT -p80 linuxhint.com -v |
You’ll notice that the DNS resolution is working smoothly with the help of ProxyChains. Your Nmap scan was a success!
Feeling adventurous? Try another scan using this command:
| sudo proxychains nmap -sT -v 172.67.209.252 |
And there you have it! This guide should have equipped you with the know-how to use Nmap alongside ProxyChains. Wishing you the best of luck as you embark on your journey to navigate various networks like a pro! Happy scanning!

