In Windows, the “IRQL NOT LESS OR EQUAL” error generally means that there is an issue with your system files. A corrupted SSD or HDD can cause this error mainly because they are responsible for storing crucial information in them. You can easily repair this by fixing those files through the default repair tools on Windows. Another reason for this error could be bad RAM. Today we’ll be talking about seven tips that can help you solve the ‘IRQL NOT LESS OR EQUAL’ error in Windows.
Table of Contents
Use DISM & SFC to Fix the Corrupted System Files
The most frequent trigger for this error is said to be corrupted system files. This might have probably occurred when your PC has been shutting down inappropriately. Fortunately for you, there are tools within Windows which can fix it.
Follow these instructions:
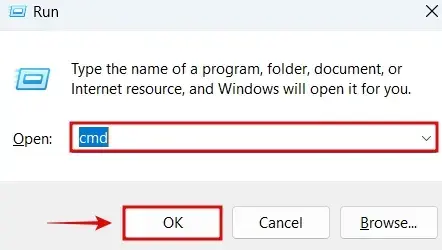
- Press the ‘Windows + R’ keys to open the Run tool.
- Enter ‘CMD’ and click on OK.
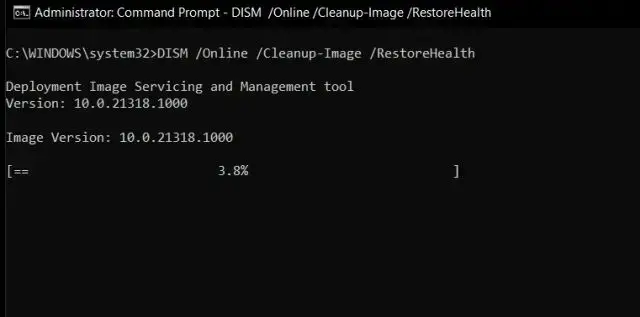
- Copy and paste the following commands into Command Prompt and press Enter after each one.
- Note that these commands depend on an active internet connection to work.
DISM /Online /Cleanup-Image /CheckHealth
|
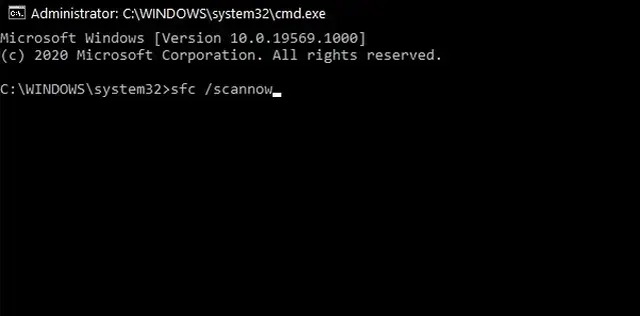
- After running these commands, type the following command and press Enter:
| SFC /scannow |
- This command will run a tool called System File Checker that checks and fixes your system files.
- Once it’s finished your computer should be stable and the IRQL_NOT_LESS_OR_EQUAL error should be fixed.
Perform a System Restore
Another easy way to correct this error is by going to a point in time when the system was functioning properly Here’s how you can do it:
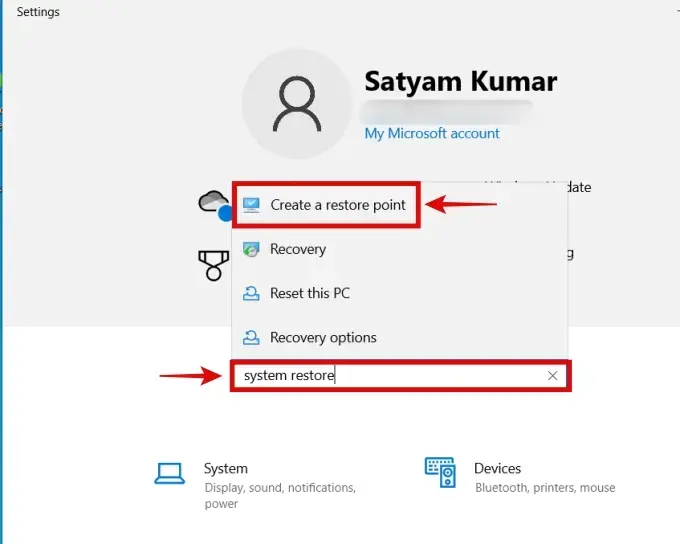
- Press the Windows + I keys to open Settings.
- Type “System Restore” in the search bar and select “Create a restore point.”
- Click on “System Restore.”
- When the System Restore window opens, click “Next.”
- Choose a restore point from a date when the error wasn’t happening. Then, click “Next.”
- Click “Finish.” Windows will start restoring your system automatically.
Update Windows & Drivers
Updating device drivers and Windows can also help you in avoiding errors like this. Read below the following steps to learn how it can be done:
- Open Settings by pressing the Windows+I buttons at the same time.
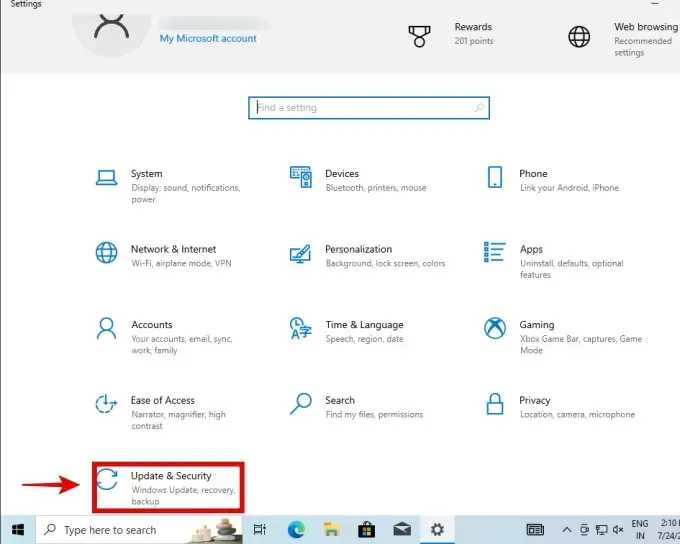
- Scroll down, then click on Update & Security.
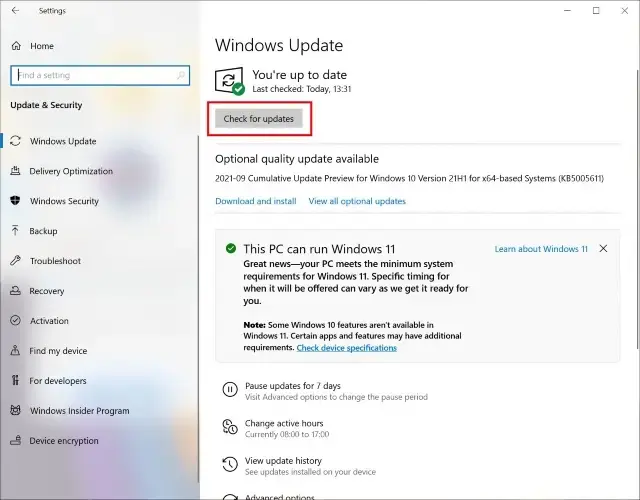
- Determine whether there is any new Update by clicking on “Check for Updates”, if there are any, windows will automatically fetch and install it on your computer otherwise you are good to go after restarting your PC.
- Alternatively, you can also use any third party programs such as IOBit Driver Booster in order to keep your drivers up-to-date.
Run a Memory Test
Faulty memory is also another big cause for the ‘IRQL NOT LESS OR EQUAL’ error. If you want to run a memory tests, here’s how to check your memory:
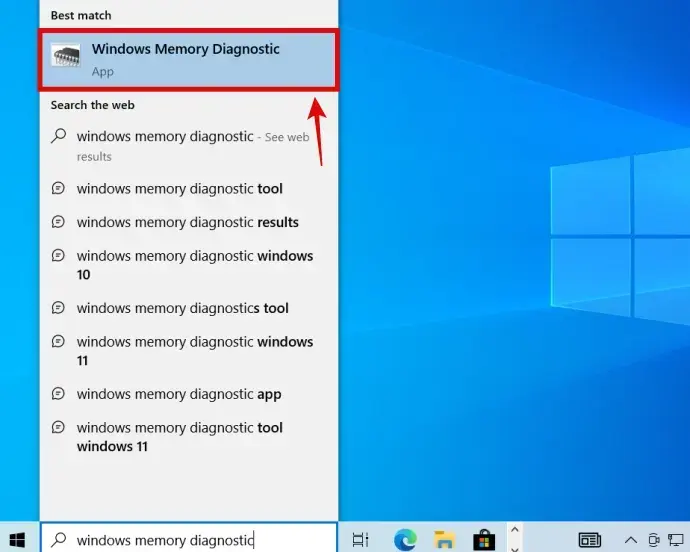
- To open search press the Windows + S keys
- Now type “Windows Memory Diagnostic.”
- Click on the appeared results.
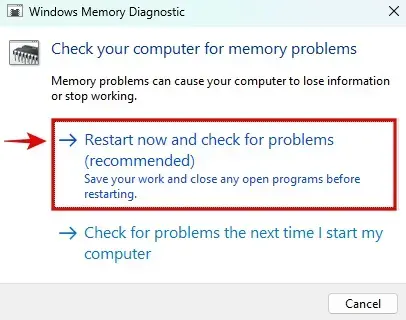
- You will find “Restart now and check for problems” as an option, click on it.
- The tool will start scanning for a memory problem once your PC starts.
- You can also use different tools like MemTest86 which can help you thoroughly test your RAM and see if it’s faulty.
Check Storage Health; Consider Replacing OS Drive
Sometimes a faulty storage drive can cause the ‘IRQL NOT LESS OR EQUAL’ error. If the SSD or HDD with your Windows OS is faulty it can cause this error. Read the following steps to find one of the best ways to check your Windows 10’s storage health.
- Start by pressing the ‘Windows + R‘ keys to open the Run tool.
- Now click OK after typing ‘CMD‘.
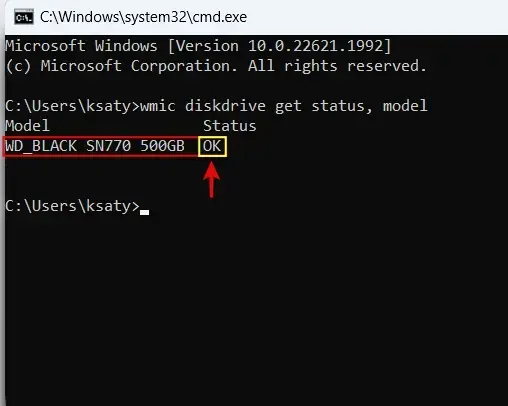
- Type the following command and press Enter in the Command Prompt window:
| wmic diskdrive get status, model |
- If your drive status says ‘OK‘ then your drive is fine.
- You can also use tools like Hard Disk Sentinel and CrystalDiskInfo and for a more detailed check.
- You can also try replacing your drive and then reinstalling them again in your operating systems in case your HDD or SSD is not ok.
Clean Install Graphics Drivers
Sometimes in order to fix your BSOD error, you can try reinstalling your GPU drivers. It is really easy and you can do this by following the steps below:
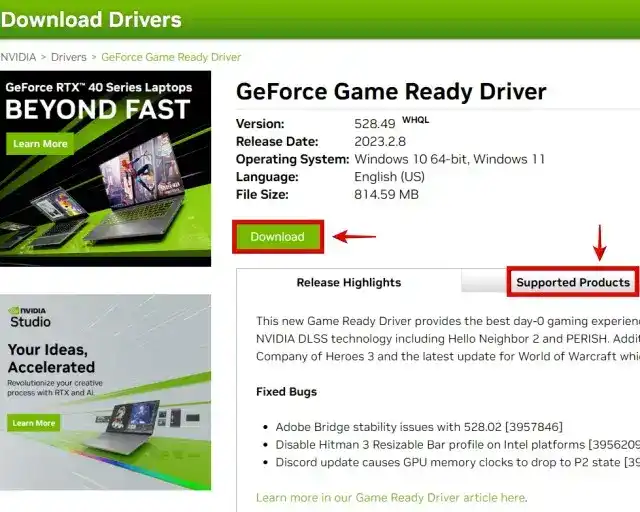
- First thing first, go to the manufacturer’s website and download the GPU drivers. You can choose from AMD, Intel, or NVIDIA.
- Now go through the initial installation steps once you are done with launching the GPU driver installer.
- You will find options like ‘Factory Reset’ or ‘Clean Install’.
- Choose that option and then start with the installation process
- Once done, if the GPU drivers were causing the error then these steps should fix the issue after you reboot your PC.
Disable Third-Party Services
When you boot your PC, third party services that launch at startup can cause this error. You can easily fix it by disabling these third-party services. Here’s how:
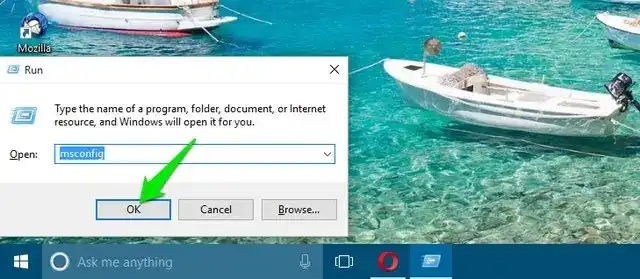
- Start by opening the Run tool, you can do this by pressing the
Windows + Rkeys. - Now type
msconfigand then click OK.
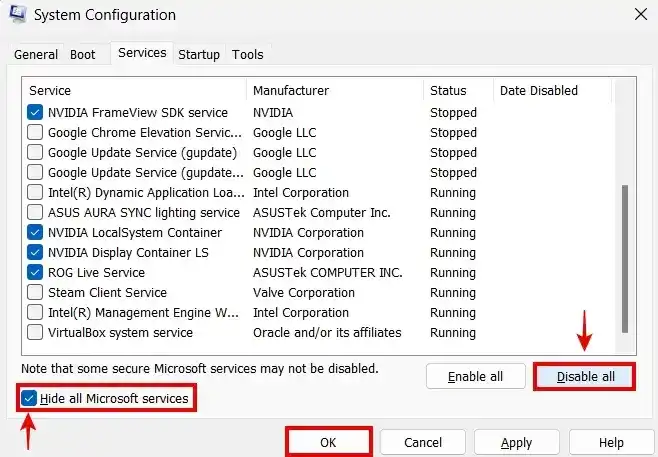
- In the ‘Services’ tab you’ll find a box next to ‘Hide all Microsoft services’. Click on it to hide the services.
- Now disable the third-party services by clicking on the ‘Disable All’.
- You also have to make sure that all the essential services are still enabled. This can vary based on the PC you use. An example of these services include services from graphic card manufacturers like Intel, AMD, or NVIDIA. Or services from the motherboard manufacturer of your PC like ASUS.

