Steady shots are the heart and brain of the incredible video. This is because they cater to the high retention rate and make everything inside visible. This keeps the readers attached to the video longer and consumes the information inside.
In contrast, the unsteady or unstabilized shots don’t do so. This is because they feature a lot of movements, vibrations, and wobbliness. The shot taker or footage recorder dreams to achieve the highest possible level of steadiness in their shots. But whether you are a novice or a pro, your videos have some instability. But you can cope with this, wondering how?
The video stabilizer will assist perfectly in this regard. It aligns with the working algorithm that a video editor for YouTube follows. Want to uncover the intro and how to stabilize your videos using this tool? Keep reading this article.
Table of Contents
Video Stabiliser – Main Role and Concept
The key concept behind the video stabilizer is that you can refer it to a tool or an application. Video stabilizers exist on the internet. It utilizes the latest AI algorithms to cater to its users and harnesses the true potential of their videos. The AI takes full responsibility for removing the shakiness, vibrations, and movements. You don’t need to deal with any kind of tweaking while doing so.
How do Video Stabilizer Work? – Step By Step Insights
Video stabilizers require the following key steps to make them functional. These steps are as follows for your consideration:
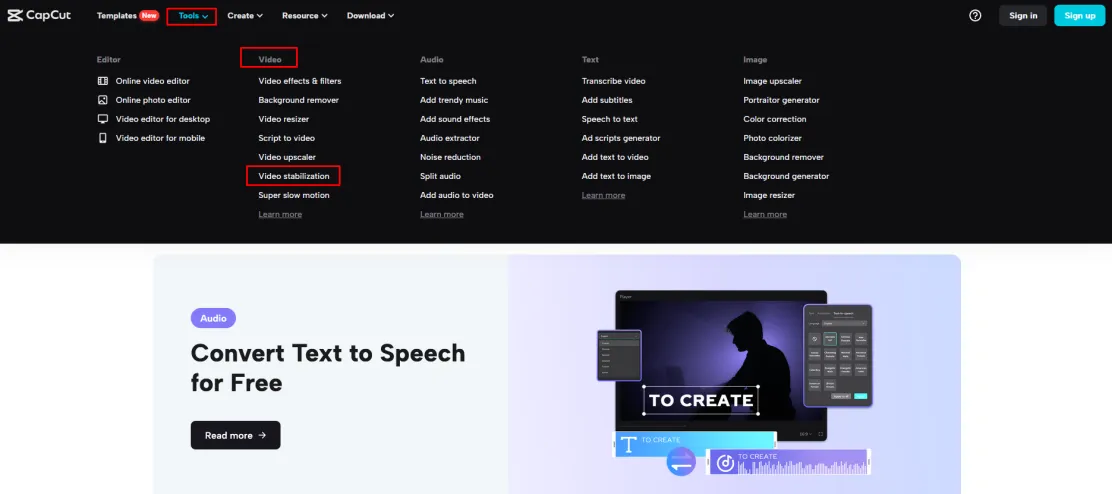
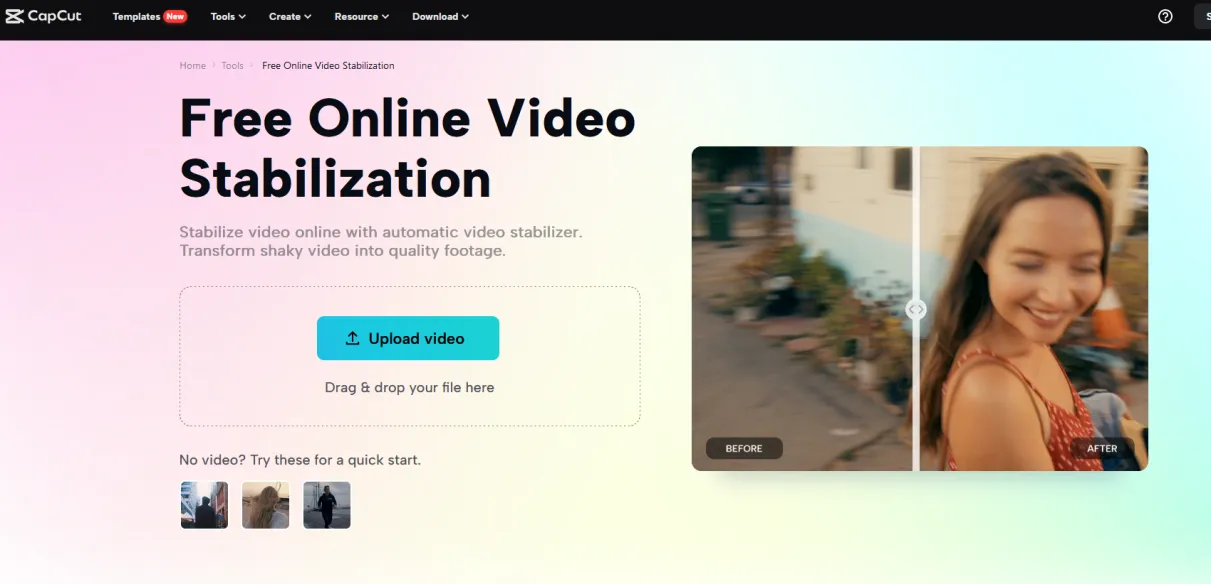
- To begin using the video stabilizer, you only need to access the CapCut platform. Visiting the online platform allows you to observe the service. On the main page of CapCut, you will observe a menu bar containing multiple options, each serving particular needs. Among multiple options, there lies a tool option. You need to access this option and select it. Selecting or hovering over the cursor will open up a drop-down menu. The menu contains multiple tools in different categories: audio, images, and video. Go to the video section and click on the video stabilization tool. This will move you to the main page of the video stabilizer.
- Next comes the uploading of the video, which you need to stabilize. The video stabilizer is incredible because it offers two different ways to do so. One is by employing the drag-drop option. This makes you select the file from anywhere, either from your system or from the cloud. After selecting the file, drag it to where the upload video tab exists. Another way to do so is by selecting the file from the specific saved location within your system. This way, you can click on the upload video tab. A window opens right after that, facilitating the selection process.
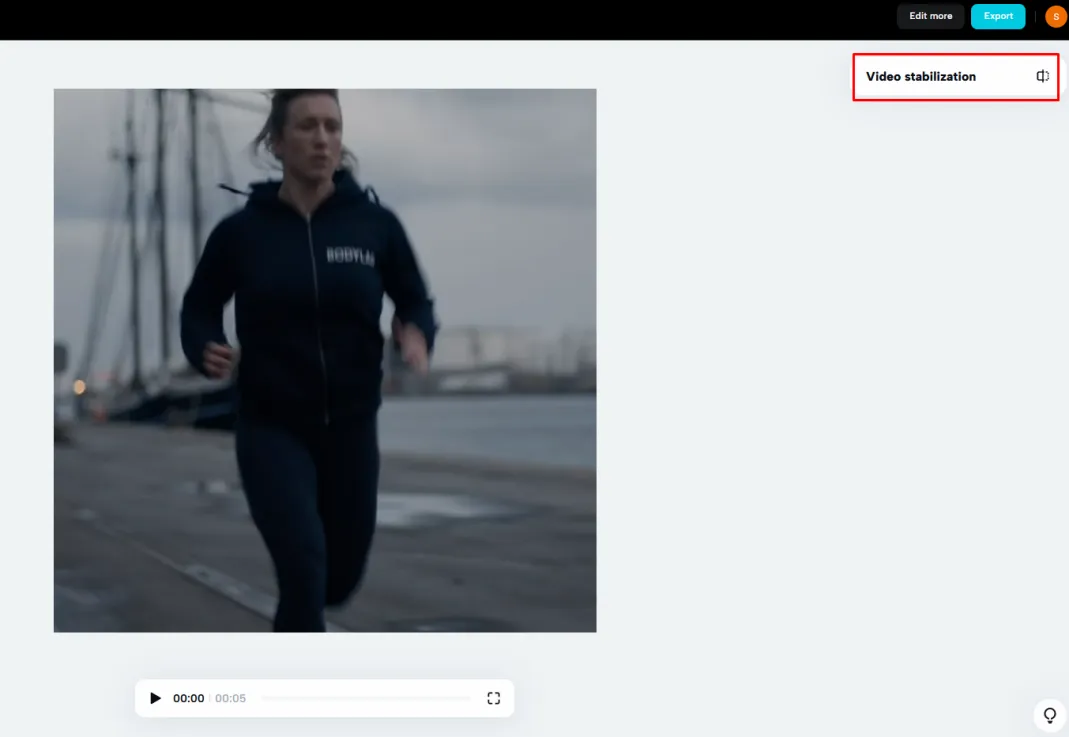
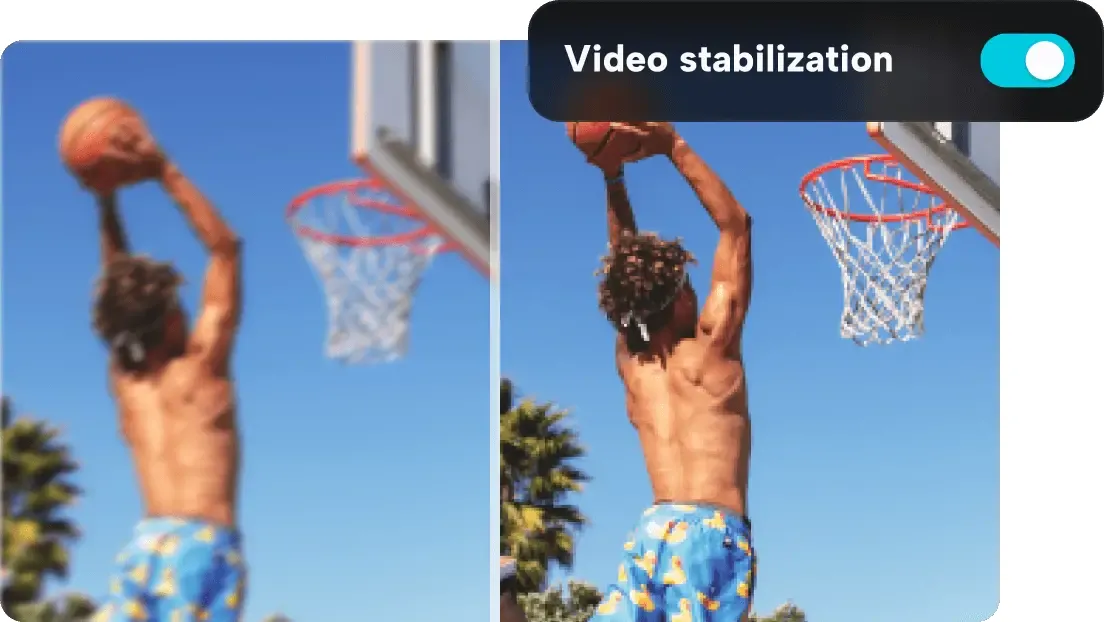
- In the third step, the AI begins tweaking the process. It automatically detects the flaws and errors regarding movement or objects featuring higher movement. Later, the AI technology tweaks the results accordingly. The good thing about the third step is that you can revert the preview changes. You can do so by accessing the video stabilizer tab in the top right corner, as shown in the image below. This will help you note the difference between the real and stabilized images.
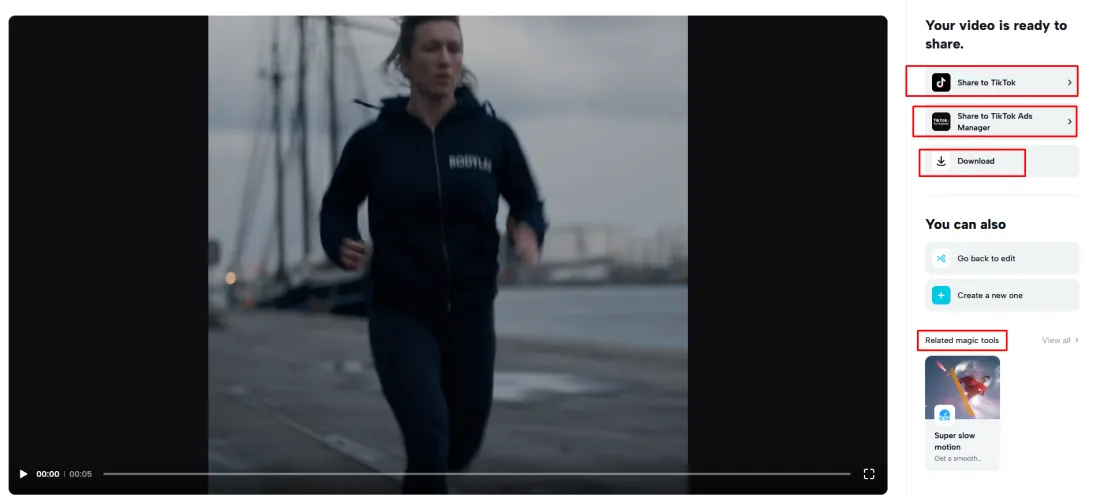
- The last step in using the video stabilizer is downloading the video. You can start this by going to the export tab. Clicking on this tab, you will see multiple options such as share to TikTok, share as an ad on TikTok, download the video, and tweak it with the magic tool. Do whatever you want if the stabilized video needs further editing.
How Can Video Stabiliser Cope-Up With Your Photography Editorial Task?
There are a plethora of features and benefits that you can harness from using the video stabilizer. Some of the key features and perks include:
Retains Originality
The video stabilizer allows you to keep the details as it is. It does not alter the colors, objects, and orientation. Instead, you can keep everything as it is. The AI induces stability by keeping the objects and things steady beside the camera’s movement.
Instant Output
The process associated with the video stabilizer is not lengthy and hectic. Instead, the process is very short and highly intuitive. Maintaining your pace will help you convert as many videos as you want. Only a few seconds is the processing time of the video stabilizer.
Vast Training Data
The AI technology of the video stabilizer uses thousands of videos as the training data. These videos enable the AI to get trained on the gyroscope feature. It will eventually help you eliminate the vibration, movement, jitteriness, etc. It also assists in accurate output by the video stabilizer.
Adds To Video Engagement
You can boost your video engagement rates using the video stabilizer. This way, you can keep the users hooked to the video throughout the video span. Indirectly, this contributes to the watch time and your net ROI.
Where To Employ Video Stabiliser?
There are many fields and areas where you can use the video stabilizer. Some of the key areas are:
Vlogging: Video stabilizer serves best regarding vlog recording and editing. It helps you make your vlogs effective and impressive.
Wedding Videography: Take wedding videography to a whole new level with the video stabilizer.
Action Sports: Using the video stabilizer, you can smooth out the action sports videos. For instance, it includes car races, wrestling, etc.

