There are various instances where you might find yourself in need of recording the internal sound of your computer. Whether you’re looking to capture the audio from a video, record online calls, or save the background music from your games, Windows systems offer some excellent software tools that can help you accomplish this task.
In this comprehensive guide, we will explore a popular recording application called Audacity. Audacity allows you to effortlessly record audio from both your microphone and your computer system. Furthermore, we will also discuss other recording software options available for Windows 10, providing you with a wider range of choices to suit your audio recording needs.
Table of Contents
How to Record Computer Audio with Audacity on Windows 10
If you’re not already aware, Audacity is a longstanding recording software that is both free and open-source. With this versatile tool, not only can you create original audio recordings, but you can also manipulate and enhance pre-existing audio files. Audacity boasts an extensive array of features designed to facilitate the editing and blending of various types of audio files on your personal computer.
One of the standout advantages of employing Audacity for this purpose lies in its user-friendly capacity to capture audio directly from your system. You need not navigate convoluted menus, as there exists a conveniently accessible option specifically tailored to facilitate the retrieval and recording of sound from your Windows 10 device.
How to Use Audacity to Record Internal Audio on Windows 10:
Step 1: Configure the Recording Settings
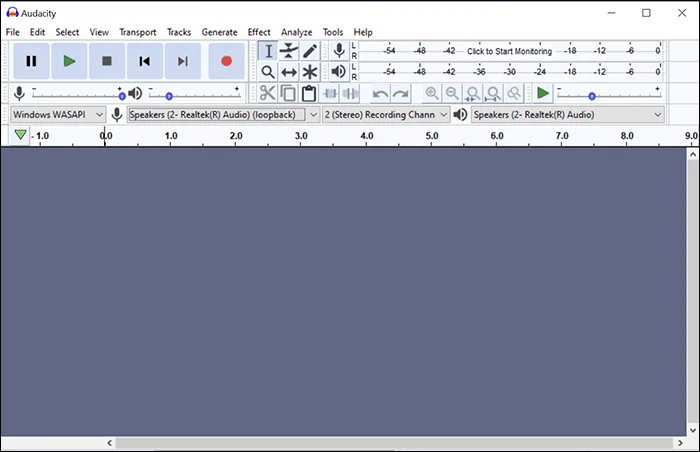
After successfully installing and launching Audacity on your computer, it’s time to set up the recording options. Although the main interface offers numerous features, you can selectively choose the ones necessary for your recording. Start by selecting the initial dropdown menu and opt for “Windows WASAPI” from the available options.
Next, locate the dropdown menu adjacent to the microphone icon and select your computer’s speakers. These speakers will serve as the audio source for your upcoming recording session.
Step 2: Commence Recording Your Computer Audio
With the previously configured settings in place, you are now ready to initiate the recording of your computer audio. To begin, simply locate and click the prominently displayed red recording button within the tool’s interface.
As soon as you do so, Audacity will commence capturing the audio output from your system. You will be able to monitor the real-time progress of the recording directly on your screen.
Step 3: Cease Recording Your Computer Audio
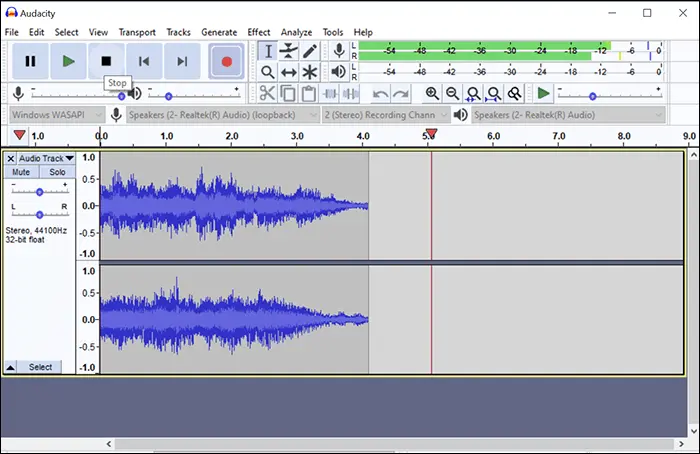
Feel free to keep the recording active for as long as necessary. Once you’ve completed your audio capture, it’s time to conclude the process. Locate the stop button situated in the top menu bar of the tool and click on it. By doing so, you’ll effectively halt the recording, although the recorded file will not be saved just yet.
Step 4: Preserve Your Recorded Computer Audio
Upon successfully completing and concluding your recording, it’s time to preserve the captured file by saving it in an appropriate audio format on your computer. Follow these steps to accomplish this task:
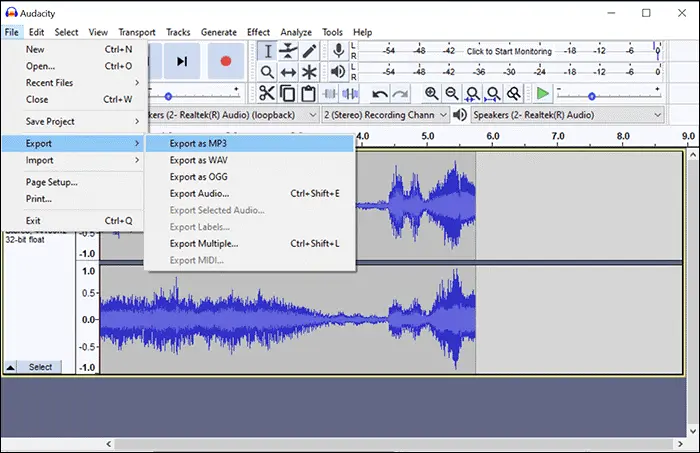
- Navigate to the “File” menu located at the top of the interface.
- From the dropdown menu, select “Export” and subsequently choose “Export as MP3”. If desired, you can opt for an alternative audio format that suits your preferences.
- Specify the destination folder where you wish to store the saved file.
- Lastly, initiate the saving process, and Audacity will handle the rest, ensuring that your recorded audio is securely preserved in the chosen format within the designated folder.
Record Computer Audio on Windows 10 with Other Audio Recorders
There are numerous alternatives to Audacity for recording internal audio on a Windows system. These alternative programs offer a range of features and may even surpass Audacity in terms of functionality and usability. The following guide will help you explore these options and demonstrate how they can be used to record system sound on your PC.
Utilize EaseUS RecExperts for Recording Computer Sound on Windows 10
While Windows 10 provides several built-in tools for recording computer audio, EaseUS RecExperts, a user-friendly screen recording software, offers an array of simple and convenient options for this task.
Whether you’re a novice or an expert, you’ll find it effortless to capture various types of sounds on your Windows system using this tool. The program boasts an intuitive interface, eliminating any complexity in terms of options or configurations.
To capture audio from your computer, a simple series of steps can be followed to achieve the desired result. The process involves selecting specific options and utilizing a tool that is readily available for free download.
Utilizing EaseUS RecExperts for Computer Audio Recording:
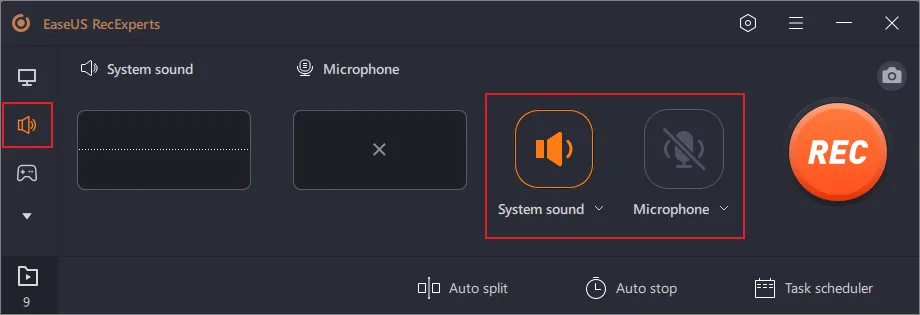
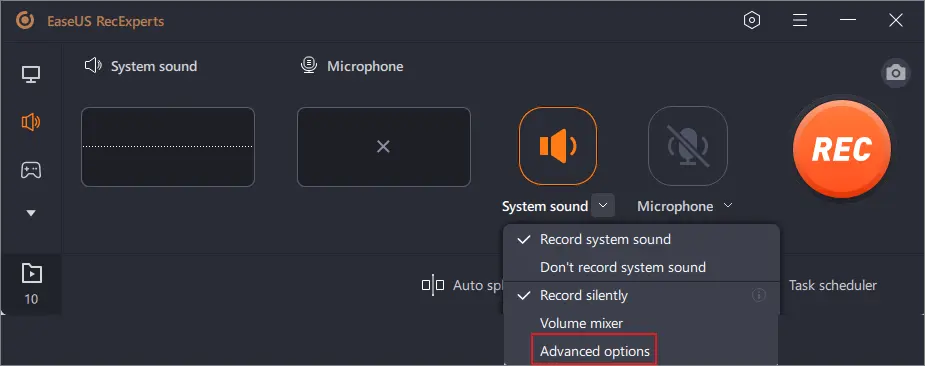
- Step 1: Initiate the EaseUS RecExperts software on your computer and locate the icon resembling a speaker on the left side of the main interface.
- Step 2: To capture internal audio, navigate to the following window and opt for the “System sound” choice. Further adjustments such as volume control can be made by accessing “Advanced options” within the “System sound” menu.
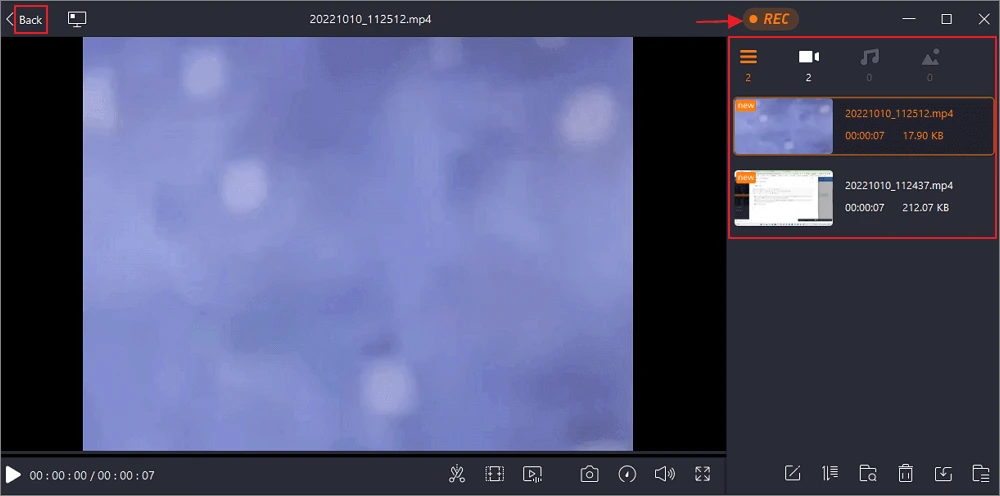
- Step 3: Proceed by initiating your recording through the utilization of the prominent red “REC” button. Should you wish to pause or terminate the recording, corresponding buttons are available to facilitate these actions.
- Step 4: Once you have completed your recording, access the pop-up recording list window to locate and access the resulting audio files.
Capturing Computer Audio with OBS on Windows 10
OBS, short for Open Broadcaster Software, is a widely recognized screen recording application that operates on an open source platform. This software grants you the ability to record diverse forms of content, encompassing both screen activity and audio input.
One notable advantage of OBS is its capacity to accommodate an unlimited number of scenes, as well as the option to incorporate multiple recording sources. By selecting your computer’s speakers as the designated recording source, you can effectively capture the internal audio emitted from your system.
Using OBS for Computer Audio Recording:
- Step 1: Upon launching OBS, locate the “Sources” section and click the “+” (plus) symbol. From the options available, select “Audio Output Capture”.
Confirm your selection by clicking “OK” on the subsequent screen, effectively adding an audio source.
- Step 2: To initiate the recording of your internal audio, locate the “Start Recording” button positioned on the right side of your screen.
By selecting this option, the audio from your designated source, namely your internal audio, will begin recording.
- Step 3: Once you have completed your recording, click the “Stop Recording” button located on the right side of the interface. This action will save your recording on your computer.
- Step 4: After concluding your recording session, you may wish to access and play your recorded audio.
To accomplish this, navigate to the “File” menu at the top of the screen and choose “Show Recording”. This action will open the folder containing your recorded audio files in File Explorer.
Recording Internal Audio on Windows 10 with Icecream Screen Recorder
Icecream Screen Recorder is a comprehensive screen recording software that offers a range of functionalities, including the ability to record both microphone and computer sound. By utilizing this feature, you can effortlessly capture high-quality computer audio recordings, allowing for flexibility in terms of quantity and duration.
Utilizing Icecream Screen Recorder for Recording Computer Audio:
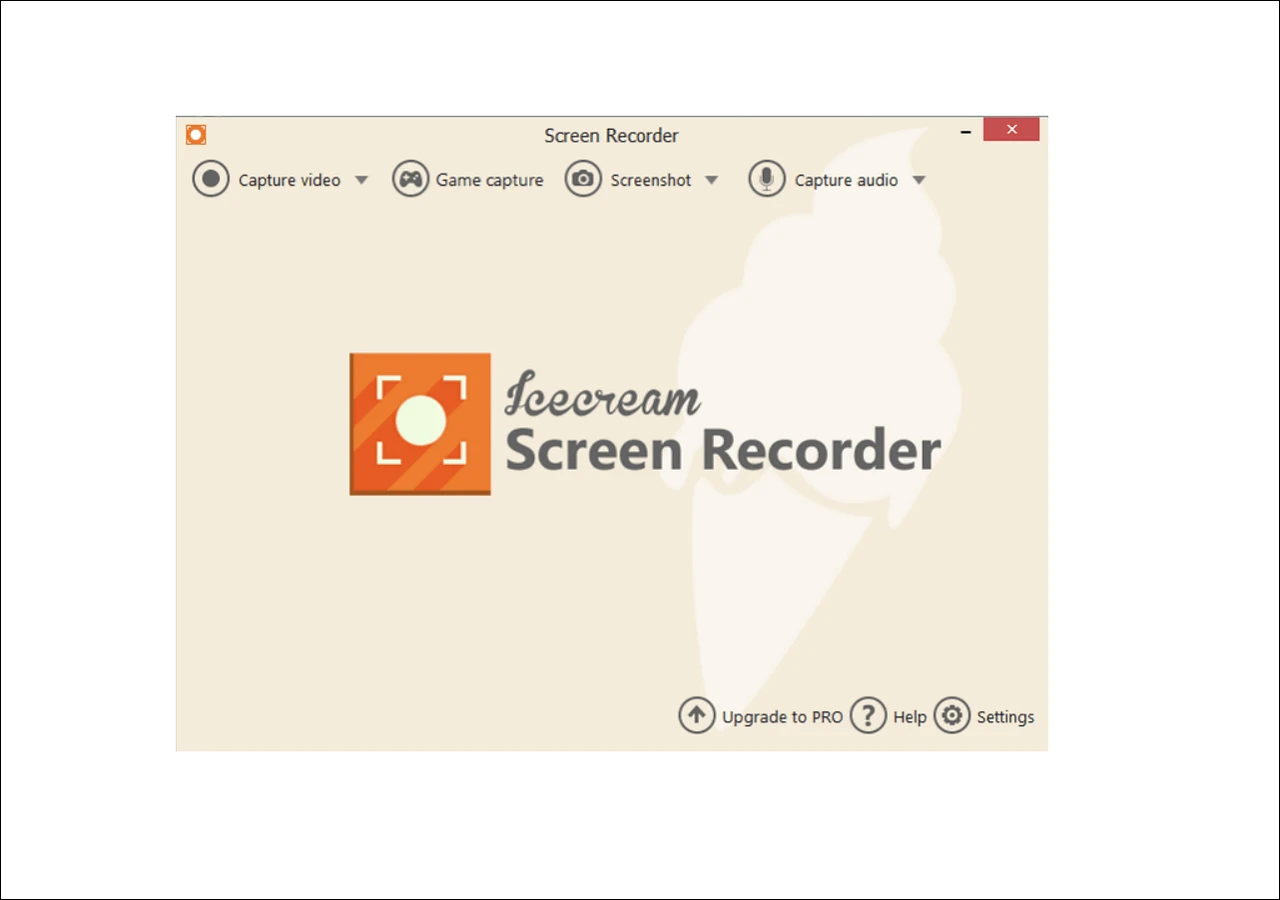
- Step 1: Once you have installed the software, launch it and navigate to the bottom of the interface. Click on “Settings” and proceed to the “Audio” section.
Activate the “Record audio” option and ensure to save the settings by clicking “Save Settings” at the bottom.
- Step 2: Return to the main user interface and locate the “Capture audio” option. From the available choices displayed on your screen, select one of the three options.
This selection determines the audio bitrate for your recording. Keep in mind that higher bitrates yield better quality but consume more storage space.
- Step 3: A new panel will appear, providing options to initiate and stop your audio recording. Click the “Rec” button on this panel to begin recording your computer audio. Once you have completed your recording, click the appropriate stop option to conclude the process.
- Step 4: All recordings made with the tool will be automatically saved in a designated folder. To find the path to this folder, access the “Settings” menu, and navigate to the “Save to” tab.
Capturing Computer Sound with VLC on Windows 10
VLC, a renowned media player application, now extends its functionality to include the ability to record computer audio. With this versatile tool, you can effortlessly create a range of recordings, including computer screen and computer audio captures.
VLC offers a plethora of options to tailor your computer audio recording experience. You can select from various file formats and take advantage of numerous configurable settings. Remarkably, this tool is freely available and open-source, enabling unrestricted usage for both personal and professional purposes.
Using VLC for Recording Computer Sound:
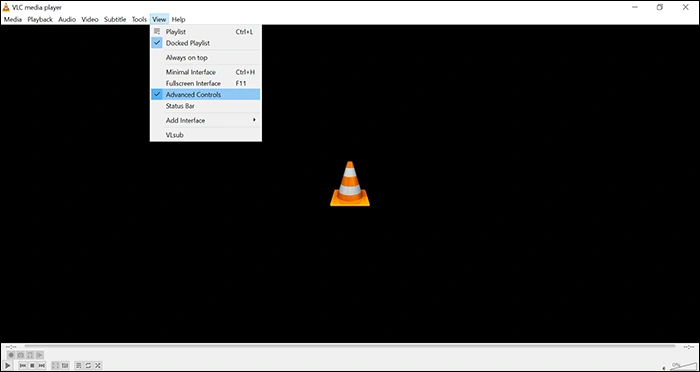
- Step 1: Ensure that the recording options are enabled in VLC if you haven’t done so already. To enable them, go to the “View” menu at the top and select “Advanced Controls”. This will add the recording options to the bottom bar of the application.
- Step 2: Set up an audio source for your recording by navigating to the “Media” menu and selecting “Open Capture Device”. In the “Capture Device” tab, choose your speakers from the “Audio device name” field, and click “Play” at the bottom.
- Step 3: Initiate your computer audio recording by clicking the recording button located in the bottom bar of the program. Once you have finished recording, click the stop button to end the recording session.

